Experiment
H3A
CALIBRATION OF A BOURDON PRESSURE GAUGE
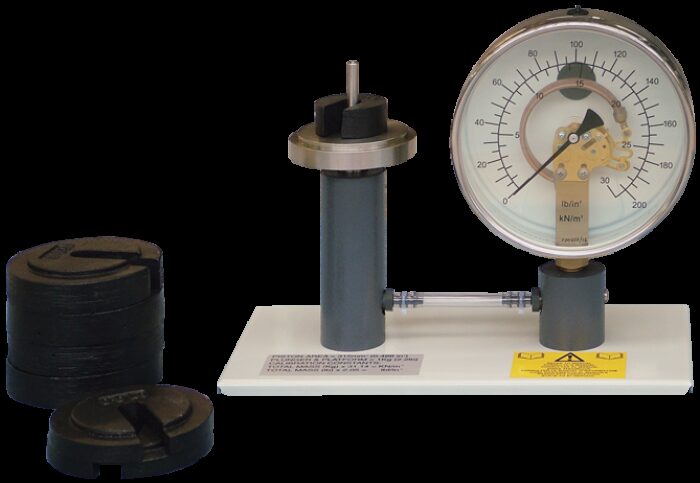
A bench mounting apparatus for calibrating Bourdon type pressure gauges using deadweight techniques.
If you have any questions or you'd like to discuss a product, please call us.
+44 1159 722 611CALIBRATION OF A BOURDON PRESSURE GAUGE
Many engineering applications use the Bourdon gauge. TecQuipment’s Calibration of a Pressure Gauge experiment allows students to study Bourdon Tube theory. They see the working mechanism, calibrate the gauge and compare theoretical results to experiment results.
The apparatus is a Bourdon gauge connected to a dead weight tester. The Bourdon gauge has a transparent dial that allows students to see the working mechanism. The mechanism is a thin walled tube with an oval cross-section, bent into an arc. One end of the tube is held rigidly. This end admits pressure. The other end of the tube, connected to a dial and pointer mechanism, is free to move. When the pressure in the tube increases, it tries to straighten and so moves the pointer by an amount proportional to the pressure increase.
To calibrate the gauge, students add weights to a platform on a dead weight tester. The weights put a known force on to a piston. The piston has a known area, so students can calculate the pressure. A flexible tube containing water transfers the pressure on the piston to the Bourdon tube. Students add the weights in increments, recording pressure readings from the gauge at each increment. They then remove the weights and record gauge readings. By working out theoretical results they can work out gauge error and discuss possible causes.
Learning outcomes
- Function, operation and calibration of a Bourdon tube pressure gauge.


